Lists created with Listory are especially easy to share with others. You can work on the list simultaneously with several people. Imagine going shopping with your family. 4 people start to collect the things in the supermarket that are on the list. If you click on done…the item will disappear for you and the other users. But the entry reappears! That is the special thing about it! So your lists are reusable. This is a decisive advantage.
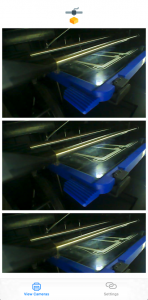
You can use the Listory Lister from eXODA for your daily tasks. That can also be shopping. Here Listory even has a special function. Listory can scan and store photos. If you take a photo of a product, others who have access to the lists will see how the product looks like.
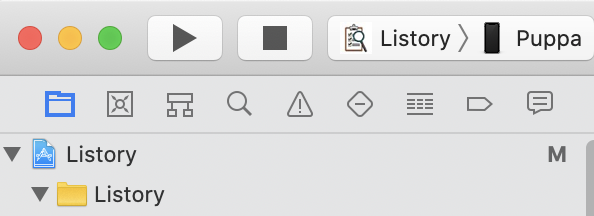
What do I need the app for? The App, which is currently only available for IOS, i.e. Apple devices, has a lot more functions. The App is available in a free and a paid version.
What about data protection? Listory works just like that, without registration. How does that work? Listory Lister generates a unique token (key) the first time you use it. Whoever has the key has access! The key is in the link. So you should secure the link well. But we don’t know who you are and don’t want to know. Your data belongs to you!
Are cookies used? Yes, but only for the basic function. Listory Lister recognizes that you have been there before and receives the key immediately. More cookies are not stored.
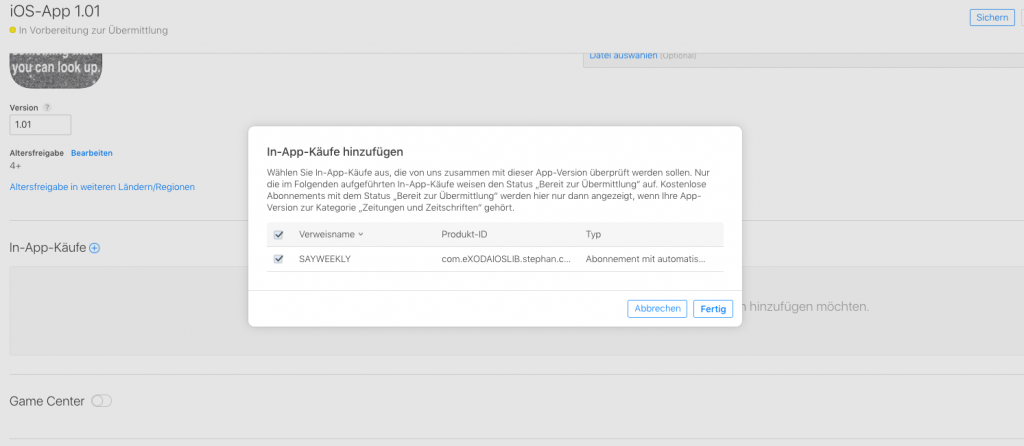
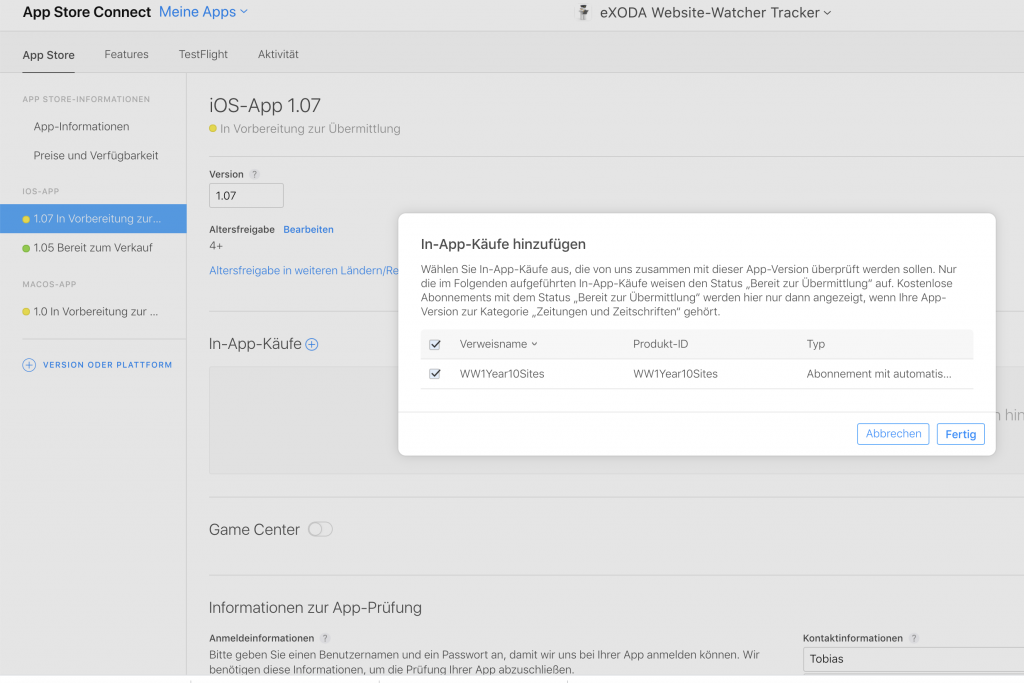
Dieser Beitrag gilt nur den kleinen Fallstricken. Apple prüft sehr genau und das ist ja auch sinnvoll. Die App selber muss zur Prüfung mit dem In App Kauf eingereicht werden. Du legst also vor einen In App Kauf fest. Der Zugriff auf die Daten des In App Kaufs ist erst nach Freigabe durch Apple möglich. Deshalb ist es sinnvoll die Prüfvorgang leicht und eindeutig für Apple zu gestalten.
Hier die Reihenfolge, in der ich vorgehe. Wir gehen davon aus, dass die App bereits existiert und nun durch In-Kauf-Möglichkeiten ergänzt wird.
zuerst definiere ich die eigenen Termins of Use in den App Informationen (mehr dazu weiter unten)
dann Anlegen des ersten In-App-Kaufs
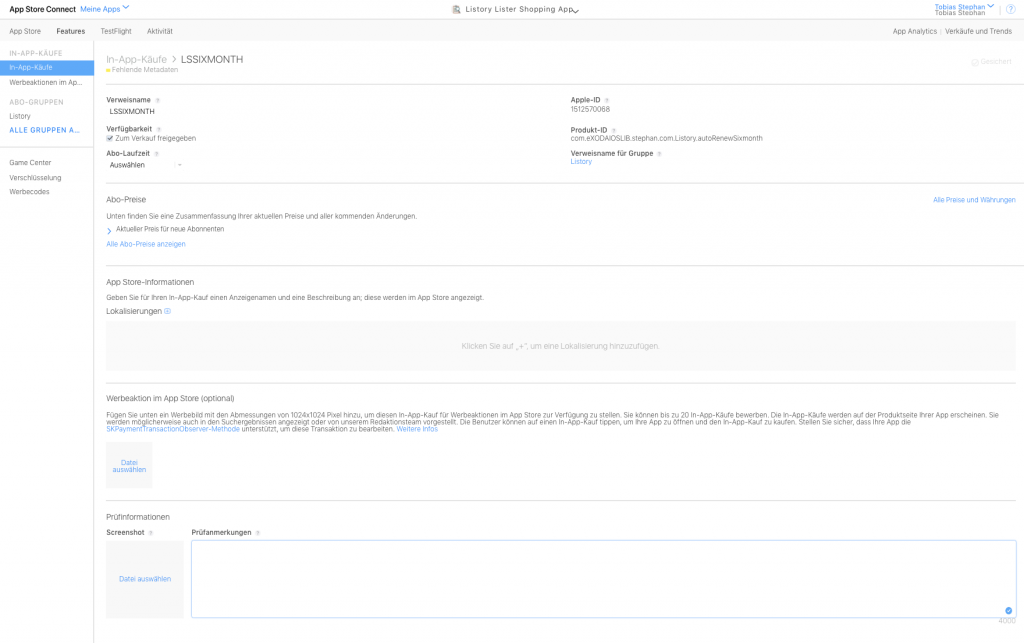
Lokalisierung bei der Abo-Gruppe nicht vergessen, sonst erscheint immer „Fehlende Metadaten“
Unter Features kannst Du einen neuen In-App-Kauf anlegen.
Beim Anlegen eines In-App-Kaufs sollte die Produkt-ID wie folgt aussehen. com.eXODAIOSLIB.stephan.com.Listory.autoRenewSixmonth
also im Format: com.eXODAIOSLIB.stephan.com.<Group>.<YourChoice>
Die Abo-Laufzeit nicht vergessen! In meinem Beispiel beträgt sie 6 Monate.
Danach muss eine Lokalisierung erstellt werden. Da ich meine Apps üblicherweise international anbiete, ist meine Standardsprache englisch. Dafür wähle ich dann English (USA). Lokalisierungen für weitere Länder erstelle ich erst später, wenn alles erfolgreich durch die Prüfung gelaufen ist.
Ebenso ist eine Lokalisierung für die Abo-Gruppe erforderlich. In eine Abo Gruppe kann man beispielsweise mehrere Autorenewable Angebote legen.
Das Promotional Image muss die Auflösung 1024 x 1024 Pixel haben und sollte kein Screenshot sein sowie die Information über den Kauf enthalten. Bei dem Screenshot für die Prüfinformation erwartet Apple einen Screenshot, auf dem der Kaufvorgang zu erkennen ist. Das Prüfbild muss die Auflösung 640×920 haben! Es wird im App-Store nicht angezeigt.
abwarten, bis der In-App Kauf „Warten auf Prüfung“
im Status „Warten auf Prüfung“ ist der In-App-Kauf für die Sandbox verfügbar
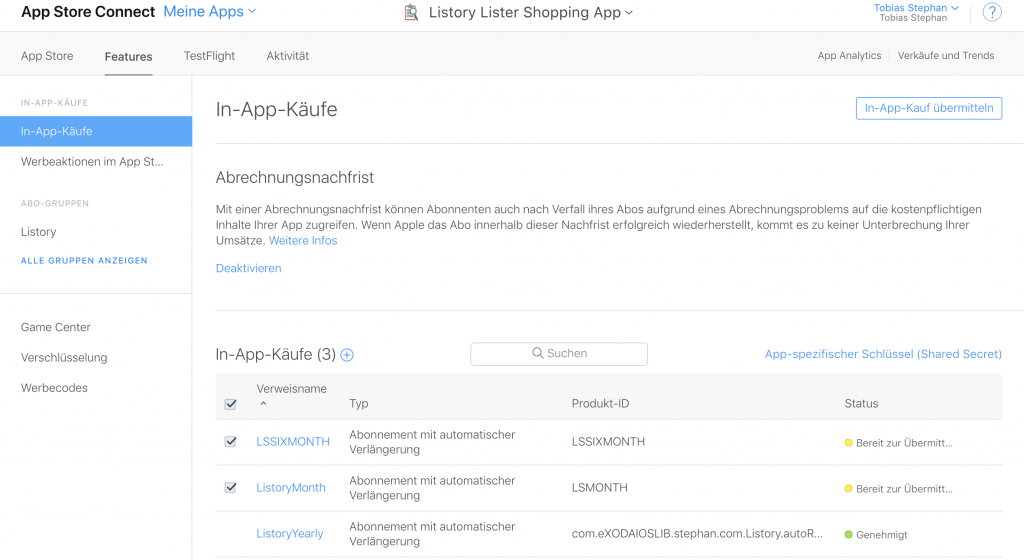
Übermitteln des In-App KaufsBeispiel Erfassungsansicht bearbeiten eines In-App KaufsÜbermitteln des In-App-Kaufs mit einer neuen Version
Fallstricke:
Das folgende promotional Bild wurde abgelehnt, weil der Text schlecht lesbar ist.
Abgelehntes Bild wegen der schlechten Lesbarkeit
Das nun folgende Bild war dann erfolgreich.
Bei der Prüfung von Apple aktzeptiert
Apple fordert in der App auch einen Link für Terms & Conditions sowie die Privacy Policy. Hier ein Generator für beides.
In Deiner App muss auf die Terms of use und die Privacy Policy verlinkt werden. Zusätlich muss der Standard Apple Vertrag durch die eigenen Terms of use ersetzt werden.
Folgendes Feedback habe ich dazu von Apple bekommen. Das erhält man, wenn man es nicht richtig macht 😉
Guideline 3.1.2 – Business – Payments – Subscriptions
We noticed that your app did not fully meet the terms and conditions for auto-renewing subscriptions, as specified in Schedule 2, section 3.8(b) of the Paid Applications agreement.
When the user initiates an in-app purchase on the App Store, they are taken into your app to continue the transaction.
However, information about the subscription must be displayed to the user prior to the purchase: • Title of publication or service • Length of subscription (time period and content or services provided during each subscription period) Price of subscription, and price per unit if appropriate
Your app must include links to your privacy policy and Terms of Use, and users should be able to access these links at any time.
Next Steps
To resolve this issue, please revise your app to include the missing information prior to initiating any auto-renewing subscription purchases within your app.
If you have no future plans on promoting this in-app purchase product, you can visit App Store Connect to delete the associated promotional image.
To delete the promoted image:
– Log in to App Store Connect – Click on „My Apps“ – Select this app – Click „Features,“ then “App Store Promotions” to view your promoted in-app purchases – Click the in-app purchase reference name that you no longer want to promote – Select the associated promotional image and delete it – Click Save
Resources
To learn more about auto-renewing subscription requirements, please review Schedule 2, section 3.8(b) of the Paid Applications agreement in App Store Connect.
Hello Tobias,
We are writing to let you know the appeal results for your app, Listory Lister Shopping App.
The App Review Board evaluated your app and determined that the original rejection feedback is valid.
We continue to find that your app description to be displayed on the App Store does not currently include a link to your app’s terms of use.
To resolve this issue, please revise your app description to include a link to your service’s terms of use.
We encourage you to review the previous rejection correspondence for this app, make the necessary changes to bring it into compliance with the App Store Review Guidelines, and resubmit it for review.
Best regards,
Jan App Review Board
Das Testen von In-App-Käufen geht durch Anlegen eines Sandbox User-Accounts. Wenn eine Autorenewable Subscription gekauft wird, gelten für die Sandbox folgene verkürzte Laufzeiten:
Jeder In-App-Kauf muss angelegt werden. Der erste In-App-Kauf muss zur Prüfung übermittelt werden. Später können weitere ergänzt werden.
Wenn die In-App-Kauf den Status „Warten auf Prüfung“ erhält, dann gilt es halt abzuwarten. Die Prüfung des In-App-Kaufs geschieht unabhängig von der Prüfung der App. Mein Vorgehen ist das veröffentlichen der App ohne weitere In-App-Käufe. Danach definiere ich diese und warte die Prüfung ab. Dann werden die einzelnen in der RebelopestoreSetup eingetragen. Im Status Bereit zur Übermittlung sind die ProductIDs auch schon aus dem XCode Projekt abrufbar.
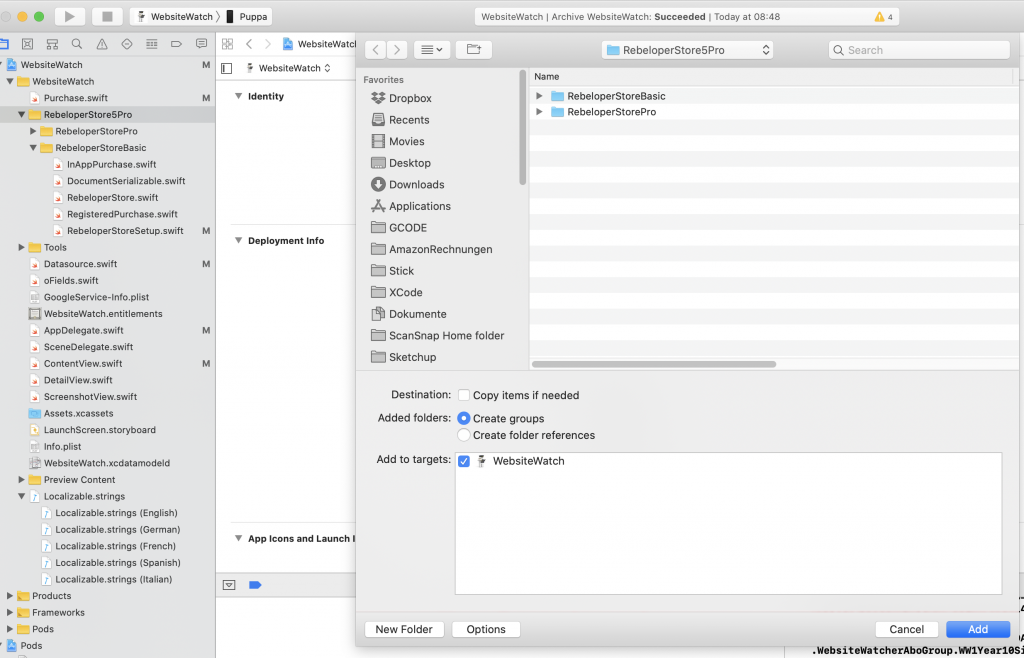
    static var registeredPurchases: [RegisteredPurchase] = [
        autoRenewableYearly,
        autoRenewSixmonth
    ]
Diese Methode Lädt die In App Purchases in eine eigene Liste, die wiederum mit dem List SwiftUI gelistet werden kann.
   func loadinapppurchases(){
        // MARK:- Populate with in-app purchases
        self.ListOfInAppPurchases.removeAll()

        RebeloperStore.inAppPurchases.observeNext { (inAppPurchases) in

            //            self.ListOfInAppPurchases.append(contentsOf: inAppPurchases)


        }
        .dispose(in: RebeloperStore.inAppPurchases.bag)

        var iIndex = -1
        for obj in RebeloperStore.registeredPurchases {
            RebeloperStore.getInfo(obj.sufix) { (product) in
                guard let product = product,
                    let _ = product.localizedPrice else { return }
                iIndex += 1
                let oInAppPurchase = InAppPurchase(id: product.productIdentifier, imageUrl: obj.imageUrl, registeredPurchase: RebeloperStore.registeredPurchases[iIndex] , title: product.localizedTitle, description: product.localizedDescription, price: product.localizedPrice!)
                self.ListOfInAppPurchases.append(oInAppPurchase)
            }

        }
    }
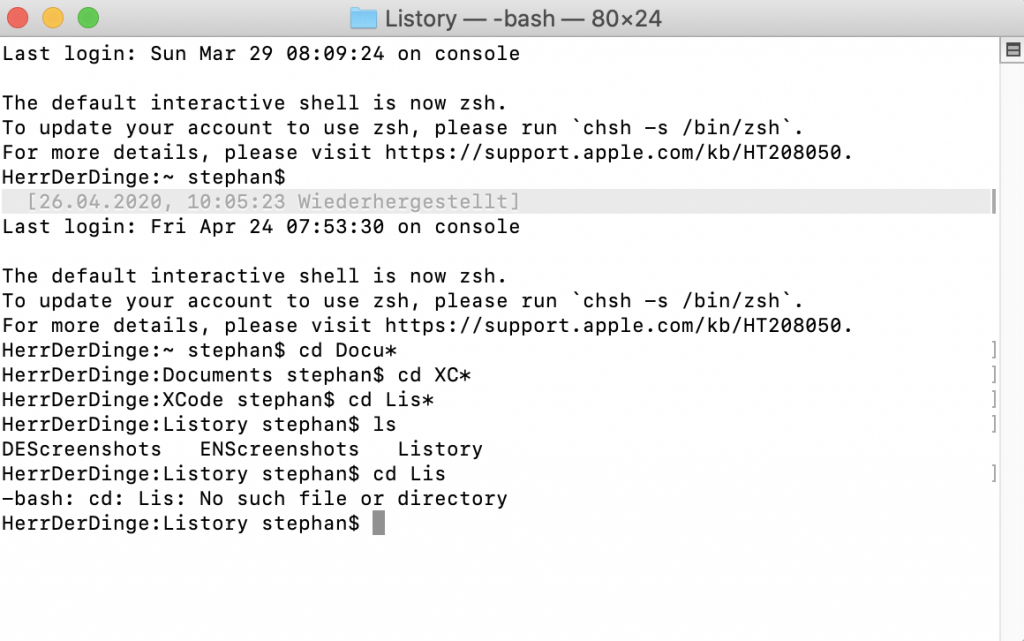
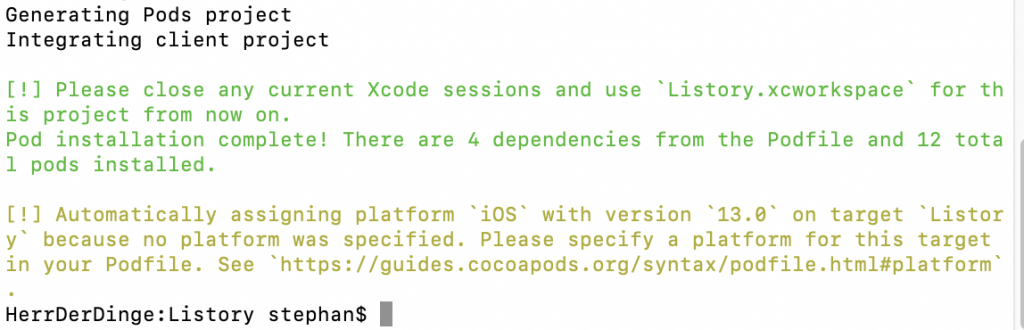
Um ein Podfile zu erstellen öffnen wir zuerst ein Terminal Fenster.
Man befindet sich ohnehin nach dem Öffnen des Terminalfensters im persönlichen User Verzeichnis. Wechsele nun in den Projektordner Deines XCode Projects. Das kannst Du auch ganz einfach bewerkstelligen, indem Du zu allererst im Terminalfenster mit dem Befehl CD beginnst und dann in XCode auf den Projektnamen klickst, und per Drag & Drop den Namen in das Terminalfenster ziehst.
…nun den Befehl:
pod init
eingeben und mit Return abschliessen.
Das war es, Dein Podfile ist nun angelegt. Wenn Du Dich nicht im richtigen Verzeichnis befunden hast, erhältst Du eine entsprechende Fehlermeldung, dann solltest Du den Pfad überprüfen.
Wenn das erfolgreich war, führe den Befehl
pod install
im selben Ordner aus.
Nach ebenfalls erfolgreichem Installationsverlauf, wurde eine Workspace-Datei erstellt.
Wir erhalten den Hinweis das Projekt künftig über die Appname.xcworkspace Datei zu öffnen.
Das wars!
Um ein Podfile zu bearbeiten, gib in Deinem Terminalfenster folgenden Befehl ein:
Manchmal ist es ja schwierig die richtigen Kontaktinformationen herauszufinden. Der Service funktioniert grundsätzlich bei Dremel recht gut, es kann aber manchmal auch etwas dauern.
Telefon: 0800 8590216
Wenn das Gerät bereits in der Reparatur ist, gilt folgende Rufnummer: 071140040400 bei der Bandsage die 2 drücken
Wie man an der Mailadresse erkennt, steckt Bosch dahinter, also wundere Dich nicht. Da ich selber mehrere Drucker von Dremel einsetze und das sehr intensiv, stosse auch ich immer wieder an Grenzen. Wenn ich selber nicht reparieren kann, rufe ich nicht an, sondern schreibe eine Mail. Innerhalb von 1 – 3 Tagen gibt es eine Antwort. Bosch schickt bei Bedarf auch vorab das benötigte Verpackungsmaterial, GLS holt den Drucker dann nach Terminvereinbarung ab.
Einsendeadresse: Robert Bosch GmbH Max-Lang-Str. 40-46 70771 Leinfelden-Echterdingen
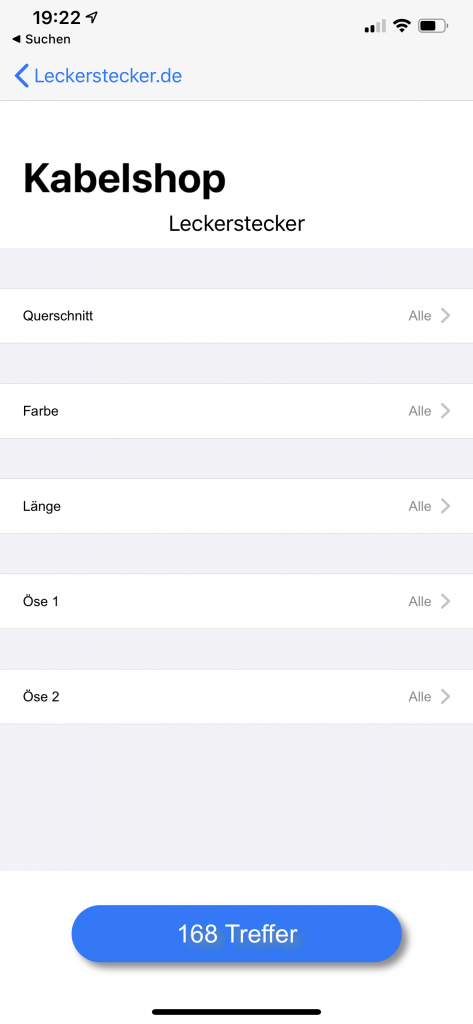
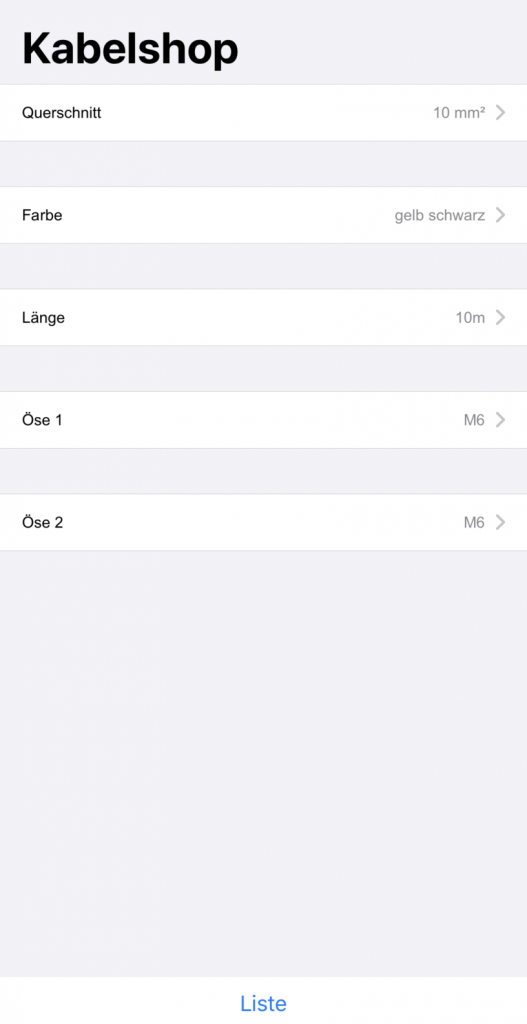
Der Leckerstecker Shop hat jetzt auch eine Kabel App!
Die Kabelshop App haben wir extra entwickelt, um unseren Kunden das Auffinden des passenden Kabels zu erleichtern. Alle Kabel im Leckerstecker Kabelshop sind fertig vorkonfektioniert und deshalb schnell lieferbar.
This is the first time I have used the Picker under SwiftUI. Simple insight – the OS decides which appearance your picker takes on. Of course you can decide that yourself. Now I had the strange behaviour that when I selected an entry of 5 pickers, all pickers were run through. My pickers are in a form. In this form a NavigationView. Solution of the problem was the Section. This example is not suitable for copy-paste because you are missing the data source. This is for illustration purposes only.
Ich habe nun zum ersten mal den Picker unter SwiftUI verwendet. Einfache Erkenntnis – das OS entscheidet, welche Erscheinung Dein Picker annimmt. Natürlich kannst Du das auch selber entscheiden. Nun hatte ich aber das seltsame verhalten, dass bei der Auswahl eines Eintrags von 5 Pickern, alle Picker durchlaufen wurden. Meine Picker sind in in einer Form. Um da Form ein NavigationView. Lösung des Problems war die Section. Dieses Beispiel ist für Copy-Paste nicht geeignet, weil Dir die Datenquelle fehlt. Das soll lediglich der Veranschaulichung dienen.
This website uses cookies to improve your experience while you navigate through the website. Out of these cookies, the cookies that are categorized as necessary are stored on your browser as they are essential for the working of basic functionalities of the website. We also use third-party cookies that help us analyze and understand how you use this website. These cookies will be stored in your browser only with your consent. You also have the option to opt-out of these cookies. But opting out of some of these cookies may have an effect on your browsing experience.
Necessary cookies are absolutely essential for the website to function properly. This category only includes cookies that ensures basic functionalities and security features of the website. These cookies do not store any personal information.
Any cookies that may not be particularly necessary for the website to function and is used specifically to collect user personal data via analytics, ads, other embedded contents are termed as non-necessary cookies. It is mandatory to procure user consent prior to running these cookies on your website.