Nuova versione 1.15 dal 02. maggio 2020
L’applicazione per le stampanti Dremel è ora completamente tradotta in 5 lingue. Anche i feedback forniti dalla stampante sono stati tradotti. L’applicazione è disponibile in inglese, tedesco, francese e italiano.
Nuova versione 1.14 del 23 aprile 2020
Dopo l’aggiornamento alla versione 13.4.1 di IOS, questo ha causato il crash dell’applicazione per alcuni utenti. Il problema è risolto con questa versione.
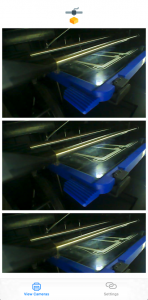
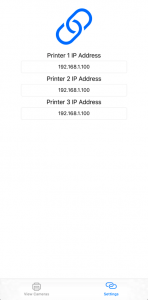
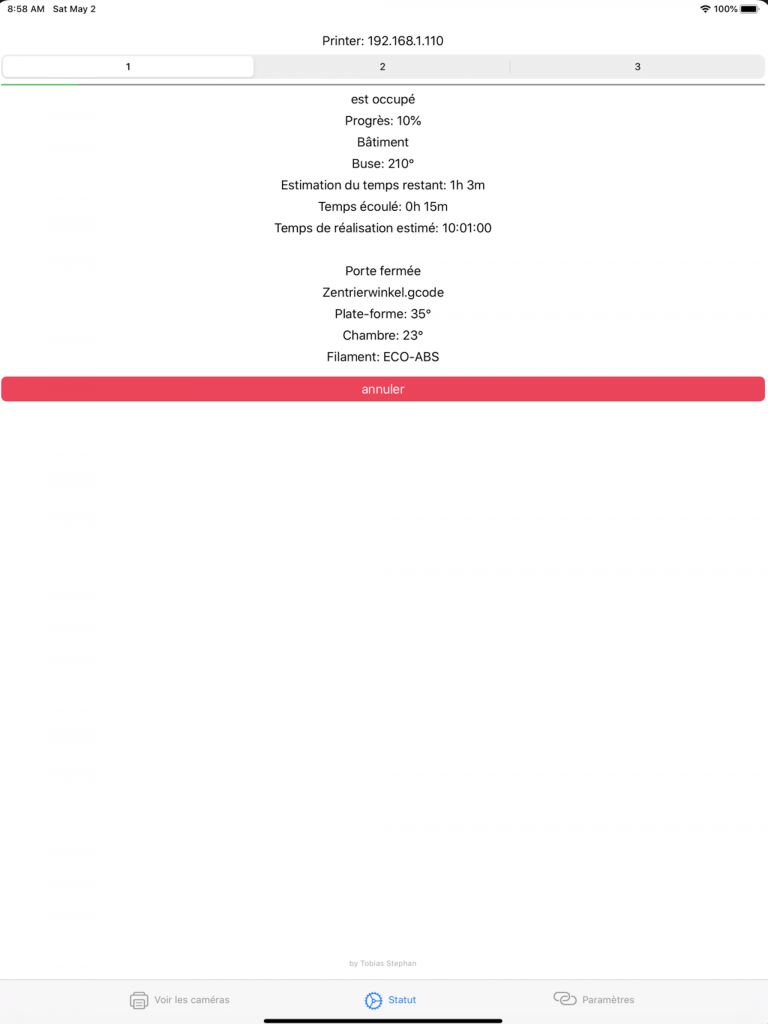
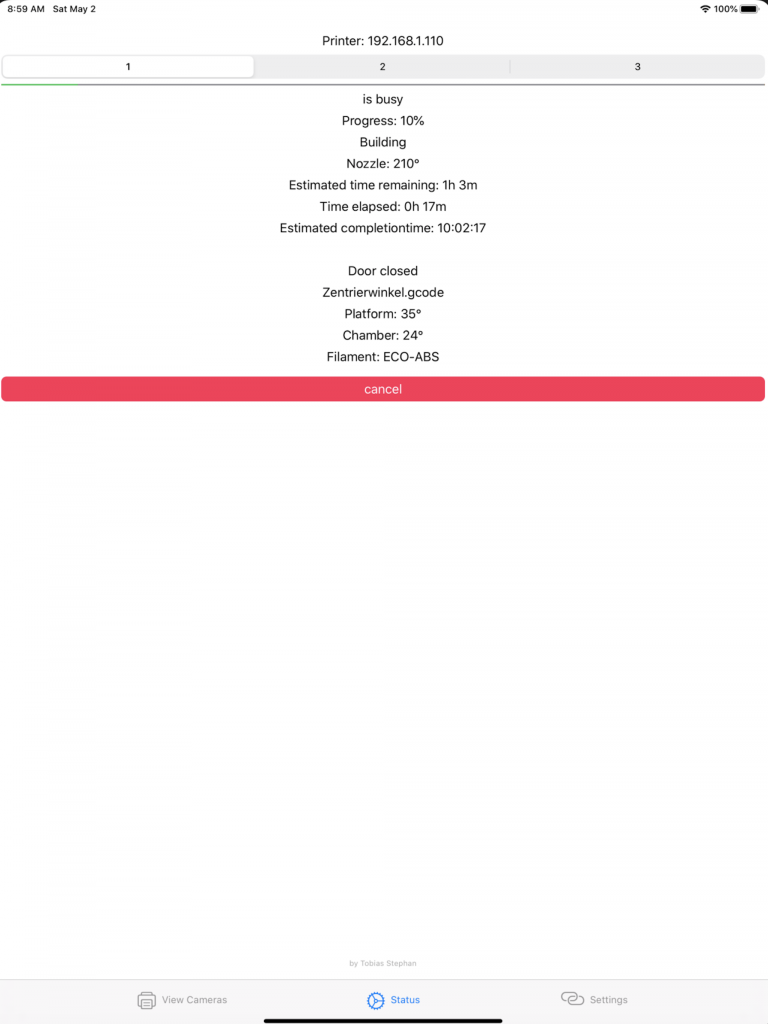
Con questa applicazione è possibile guardare fino a 3 stampanti Dremel 3D45 che creano i vostri oggetti 3D. Inoltre, ci sono messaggi di stato dettagliati, come ad esempio un calcolo del tempo fino al completamento dell’oggetto o la possibilità di annullare una stampa. Questo è particolarmente utile se si vuole controllare a colpo d’occhio se tutto è a posto durante il processo di stampa. Il vantaggio è che si può intervenire in tempo per portare l’oggetto nel mondo in perfetta forma. Basta inserire l’indirizzo IP interno dell’apparecchio sotto le impostazioni e si è pronti a partire. Con le impostazioni del vostro Dremel 3D45 potete impostare un indirizzo IP locale o utilizzare a tale scopo l’indirizzo IP V4 assegnato automaticamente. L’indirizzo IP del vostro Dremel 3D45 si trova nelle impostazioni. L’indicazione di stato contiene informazioni sull’avanzamento, la temperatura dell’ugello, il tempo, le porte aperte o chiuse, la temperatura della piattaforma, la temperatura della camera, il nome del file di stampa e il tipo di file.
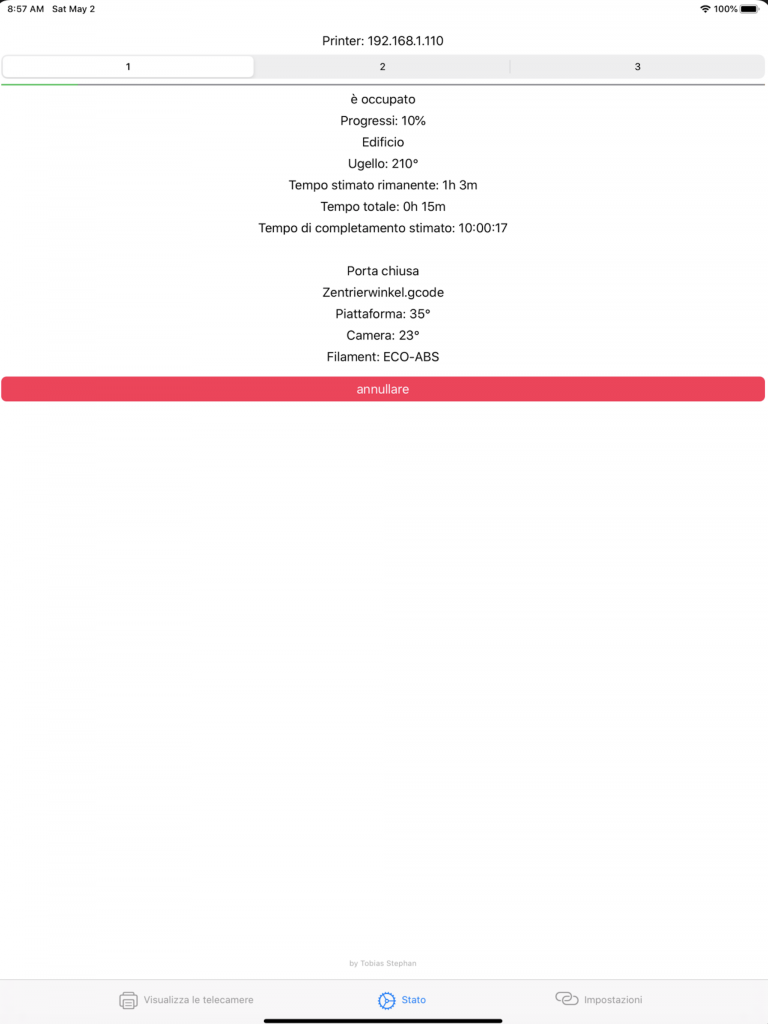
Informazioni sullo stato attuale, come il tempo di completamento previsto dell’oggetto, nonché un indicatore di avanzamento in percentuale o la temperatura attuale dell’ugello. La porta o il coperchio sono chiusi? L’app lo visualizza. Temperatura della camera o della piattaforma, con questa app siete aggiornati. Ora è possibile utilizzare il pulsante Cancel per cancellare una stampa direttamente dall’app.
L’app per Dremel 3D45 – stato e controllo della vostra stampante 3D!